HOW TO APPLY FOR A TOURIST OR A VISIT VISA TO NORWAY

Table of Contents

Norway is known as the Land of the Midnight Sun. It is famous for its phenomenal fjords, reindeer or sleigh riding, breath-taking lake views, and unbelievable magical skies. Aurora Borealis or also known as the Northern Lights is what Norway is so famous for. It is almost every travelers bucket list.

In order for Filipinos to travel to this wonderful country, one must need a Schengen Visa to Norway to make it possible. In this article, I will guide you on how to apply for a Schengen Visa to Norway with your Philippine Passport.

Who is eligible to apply for a Norwegian short-term visa?

If you plan to apply for your Schengen Visa at the Norwegian Visa Application Centre, your main destination and the maximum period of stay in the Schengen States must be in Norway. Apply only at the Embassy of Norway only if ANY of these is true and you must provide proof to support that Norway is:
  • Your main destination – Sa Norway lang kayo pupunta and will not visit any other country.
  • The country with a maximum period of stay– you will visit multiple Schengen countries, but you will stay the longest in Norway or Iceland.
  • Your country related to the main purpose of travel– you will visit multiple Schengen countries, but the main purpose of your journey is in Norway. (Example: you will attend a special occasion or a conference in Norway, but you plan on going out to other Schengen countries while you’re there.)
  • The State of first entry– you will stay in multiple Schengen countries for the same number of days, but Norway is your first point of entry, meaning, Norway will be your first entry. 

Note: You can’t apply at the Norwegian Embassy when the only country you’re visiting is Estonia. You can’t apply at the Norwegian Embassy if you’ll be staying in Estonia for one week and in Norway for two days.

Important Documents to Prepare

1. A duly filled out Online Visa Application Form and a Cover Letter – from UDI Application Portal. Once done filling out, print and sign this cover letter that was sent to your email after you did the steps mentioned from the Norway Application Portal. Besides, it also serves as proof that you have paid the visa fee online.
 

2. Two current biometrical passport photos (35-45 mm width)– have your passport photo taken. The embassy is very strict on their photo specifications. Fortunately, they have a page on their official website dedicated to explaining this. Bring at least two copies or more, just in case. You must then paste (do NOT staple) a photo on the designated space on the Checklist document. The second photo will be returned to you.

3.  Original Passport and a Photocopy of it as well as the Bio Page– The embassy requires that your passport is valid for at least another three months on the date the visa application is submitted. It also must have two empty pages for them to stamp your passport. If you have renewed your passport, bring your old one/s with you. These are needed especially if you have previous overseas trips.

Look: 33 Countries Where Philippine Passport Holders Can Visit Without a Visa


4. Proof of travel/ Travel plan (travel destination, route, proof of accommodation, and itinerary) – 
a copy of the roundtrip airline booking with dates and flight numbers specifying entry and exit from Norway. With the necessary documents needed, this should clearly state the purpose of your travel. You just need to show a flight itinerary from the Philippines that should cover your entry and exit to and from Norway and to all Schengen countries of destinations, including your exit and entry from MANILA TO MANILA (EX. MANILA-NORWAY-SWEDEN-NORWAY-MANILA).

      • cover letter addressed to the Norwegian Embassy Consul. If you are a first-time traveler to Norway, please submit an informal declaration through a cover letter explaining your willingness to return to the Philippines before the expiration of your visa: What exactly will be an incentive for you to return to the Philippines, and can you submit proofs for these circumstances?
      • Your day-to-day itinerary – be specific in indicating the place you will visit and the tours you will join or take. A good convincing itinerary requires planning and time to create. If you need help how to create one, watch my video: https://youtu.be/kME1VdZdRiw 
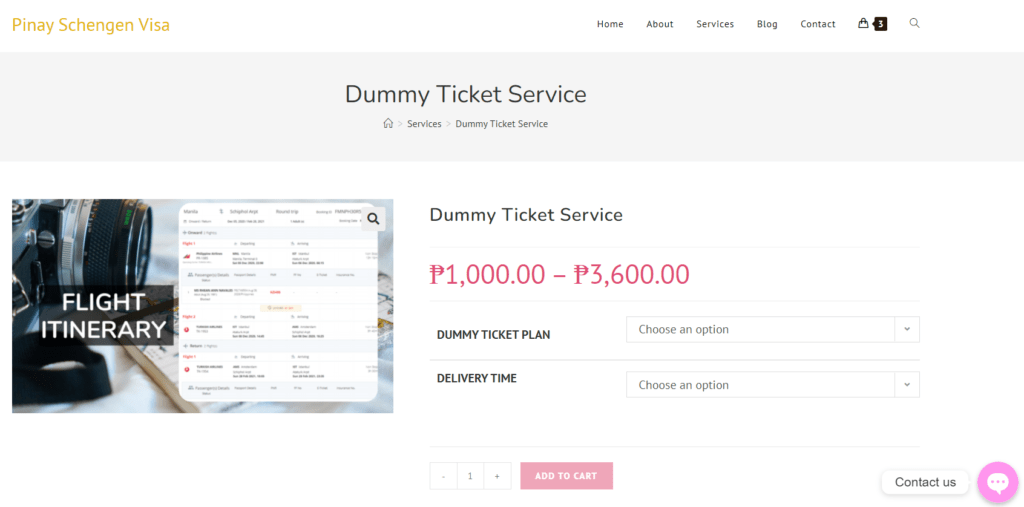
      • Flight reservation – Reservation ONLY. Do not pay for your flight reservations until your visa is approved. You can avail of my services for a dummy ticket so that I can assist you with your flight reservations. Get a flight reservation here.

5. Proof of accommodation or Hotel reservations – you would need to show hotel bookings, but this does not mean that you must pay for your hotel reservations this early. 

    • For Tourist, you would need to show Hotel Bookings, Hostels, Airbnb or apartment.
    • If you’re staying to a friend or family’s house, make sure you have:
      • an informal Invitation Letter from both:

        ➜ Document of identity, proof of citizenship/permit of stay from the inviting person: either a photocopy of the sponsor’s passport/  residence card/  registration of residency
        ➜ your host/ relative/ partner who is based in Norway– the content should include the host’s exact address of residence, the purpose of your travel, and the full duration of your travel and stay at your host’s country.

6. Travel Insurance – the coverage must be applied during the entire duration of the trip in Norway and must be valid for all Schengen countries. Coverage sum must be AT LEAST EUR 30,000 (Php 2.5 million or USD 50,000). I highly recommend Pioneer Insurance which you can avail yourself through me. Feel free to directly inquire through JASTravel on Facebook and I would be very glad to assist you. 

7. Proof of vaccination Vaccines that are recognized are only those that are registered by the European Medicines Agency (EMA): Pfizer, Moderna, AstraZeneca, Johnson & Johnson.

Coronavirus: Ist die Kritik am Impfstoffmangel berechtigt?

8. Proof of Funds or Financial Capacity – these documents are necessary to prove that you can either support yourself or your sponsor can cover your expenses financially during the whole duration of your travel.

    • If applying as a Tourist or as a Visitor without a Sponsor – this means that you will cover all your expenses during the entire duration of your travel.
      • Bank statements – must show records of the past six months. A bank statement shows your transactions in your account at a specific period. It will show debits (withdrawals, payments, taxes, service fees) and credits (deposits, interest earned.) Bank Statements can also be seen online especially if you have a registered account. There is no signature for the manager or a bank officer.
      • Bank Certificate – it is a confirmation by the branch manager or a bank officer that you have an existing account in their bank. It shows the account number, the type, and other details such as the opening date of your account, your account balance as of the date of request, and your average daily balance. 
      • Other proof of income (supporting documents) – although it is not really required, you can submit invoices and pay slip equivalent to prove that you earn enough to support this trip financially. 
    • If applying as a Tourist or as a Visitor with a Sponsor – this means that your host and/or sponsor (family, friend, partner, or fiancé) pledges to take full responsibility to cover all the expenses that you will incur during the whole duration of your travel.

If you maintain a bank account for a long time, better maintain it. Kahit na may sponsor ka, of course, plus points pa din sa visa application mo if idadagdag mo din bank statements mo, payslips from our employer, and other proof na financially capable ka din and most importantly, it proves deep rootedness as well.

Sponsorship Letter which should state the fact that he/ she is inviting you to come over, your relationship with each other, and that he/ she is willing to sponsor you during your trip. Of course, it needs to have documentary proof. 

Original Affidavit of Support, legalized by the Norwegian municipality (through Notarization) where the sponsor is registered and authenticated by the Philippine Embassy in Norway

The sponsor’s copies of: passport including the biodata page and travel history (passport stamps) and Resident ID card

Recent proof of income of the sponsor (3 last months’ salary slips, etc.)

Proof of relationship with the sponsor (pictures together, Birth or Marriage certificate, and screenshot of chat conversations)

To know more about additional requirements that you would need from your sponsor, check out my YouTube video: https://youtu.be/SEad8VHVkLk

9. Proof of Civil Status – Birth Certificate, Marriage Certificate, Death Certificate of the spouse, etc. These documents must be issued on security paper (SECPA) by the Philippine Statistics Authority, see http://www.psaserbilis.com.ph. 

Note: The birth certificate does not need to be authenticated by the Philippine Department of Foreign Affairs.

10. Evidence of your rootedness in the Philippines – Evidence of deep-rootedness a.k.a. strong family and social ties to your home country, is one of the most critical requirements when applying for a Schengen Visa. It is what the Consul will look for in your visa application. So how do you prove that you are firmly established in the Philippines and that you will go back to your home country?

    • For Employees: 
      • Employment or Work contract and bank account statements or payslips showing the transfer of your last six-monthly salaries 
      • Certificate of Employment which should include the employer’s full name, complete address, telephone number with area code, details regarding the position, income, and employment duration
      • Approved letter of approved leave signed by your employer (Leave of Absence letter)
      • Optional: Signed No Objection Certificate which states that your employer has no objection for you to travel to Norway and that they have approved your leave request
      • Most recent Income Tax Return 2316 (ITR) 
      • Optional Supporting Documents:
        › Government Mandated Contributions – SSS, Pag-ibig, Philhealth Contributions
        › If with existing loan – SSS Loan or Pag-ibig Salary loan
    • For Self-Employed:
      • DTI Business Name Registration Certificate
      • Barangay Business Clearance
      • Mayor’s Business Permit from your Municipality where the business address has been registered
      • Business activity of your company for the last 6 months – invoices and bank transactions
      • Most recent Income Tax Return 2316 (ITR)
    • For Retirees: 
          • Pension statement for the last 6 months
          • Retirement Certification
    • Others (No work, No Business, etc.): Family as Proof of Rootedness:
          • For Solo parents:
            › A copy of your birth certificate- PSA Authenticated
            › A copy of your child/children’s birth certificate- PSA Authenticated
            › Solo parent ID
            › Barangay Certification as Solo parent
            › Notarized Affidavit of Solo Parent with Undertaking
            › Money remittances to support your dependents
          • For those who are supporting or watching over the health/well-being of the family:
             A copy of my parent’s birth certificates- PSA Authenticated
            › If parents are already Senior Citizens: a copy of their Senior Citizen ID and Barangay Certification as Senior Citizens
            › If parents have sickness/ illness: Medical history of parents (diabetes, hypertension, etc.)
    • For Minors
          • Affidavit of Support by parents or Legal Guardian with their proof of means
          • Proof of Enrollment and certificate of leave of absence
          • DSWD Travel Clearance

Helpful tips: Additional document requirements for a minorhttps://youtu.be/aVUq5nbmQig

Step-by-Step Guide on How to Apply for a Norwegian Schengen Visa

The Norwegian Embassy in Bangkok, Thailand is the one who handles visa applications. In the Philippines, VFS Global is their affiliate company where you can lodge your Schengen visa application which will then be submitted to the Norwegian Embassy based in Thailand.

STEP 1: Determine the type of Norway Schengen visa you need to apply for and have a look at the checklist of requirements to gather all the documents that you need to submit. Each application must comply with the guidelines applicable for your visa category. 

Under the VISIT VISA category there are some options for you to choose from, base on the purpose of your trip:
    • Visit Boyfriend/Girlfriend
    • Visit Brother/Sister
    • Visit Daughter/Son
    • Visit Mother/Father
    • Visit Other Relatives/Friends
 

STEP 2: Gather all your documents for whichever category of visa you will apply for. Your application should be supported by a handful of paperwork based on the list of requirements needed.

Note: Once you have completed all your documents based on the checklist, make sure to secure another copy for each document. 

STEP 3: Schedule your appointment online with VFS Global.  When it comes to the Norway Embassy in Manila, they do visa applications via their external service provider, VFS Global. Unfortunately, you cannot just walk into their office to lodge an application because you need to book an appointment first online.

Here’s how you can secure an appointment slot (Click ▼ to read more.).

Visit their Application Portal website here and then click the section that says Create new user account‘.

You are now at a registration page where you need to create your own account. Provide all the details that is being asked, and make sure that you are registering an active email address. Once done, click the button that says Create user account.

Now that your account is created, you need to activate it before you can log in. So, check the email that you registered and look for a message from the Norway Application Portal (noreply-spn@udi.no). A link is included in the mail which you need to click in order to activate your account.

Note: Just in case na hindi pumasok sa inbox ninyo ang mail, check your SPAM mail. There may be instances that this happens too. 

After account activation, log-in to the page with your credentials (log-in details). Enter the email and password that you set up and click the ‘Log-in‘ button.

Click: Want to apply > New Application > followed by Appliction Forms for citizens of all countries > then choose: Visitor’s Visa

Check the box that says “I accept the legal disclaimer” and then click on “Go to application form.”

Provide your personal information, travel plans, etc. Make sure that you filled in all these details correctly.

Once you are done filling everything out, you have to pay the application fee which is EUR 60. Take note that you can only pay this on the portal with a credit card.

Once done with the payment, submit your application form on the portal. Afterwhich, you will receive an automated message on your E-mail that contains a Cover Letter. Save this attached document, print, and sign this document since you will need to submit it later on when you visit VFS.

Finally, click here to book your appointment time and date.
Note: visa applications with VFS can only be made from 11:00AM to 2:00PM, Monday to Friday.

STEP 4: Once you’ve successfully completed answering the Application Form, you can now schedule your appointment either with VFS Manila or VFS Cebu, Here is the link. Please note that you will be required to create a separate username and password for the VFS booking system.

It is also important that once you get routed to this page, you must register your information and e-mail address first. If you have already done this before, skip the account pre-registration part and simply log-in. Once the reservation is done, you will receive a confirmation via email.

To know more about the step-by-step process on how to set an appointment, please watch my vlog that I made previously for you to be guided: https://www.youtube.com/watch?v=EoYz_cWbbvchttps://youtu.be/EoYz_cWbbvc

Note: It may show on the video that the portal is for setting up an Appointment for Netherlands Visa, but the same process applies to all Schengen Visa appointment process via VFS Website. 

STEP 5: Once you completed all the requirements, show up on your appointment date with VFS Global. Show up on your appointment date. Bring all your documents as well as a photocopy of each. They will then collect your documents as well as your Passport, and get your biometrics.

You can hand in your application and the required documents here:
 
VFS Office in Manila:
Norway Visa Application Centre,
Ground Floor, Ecoplaza Bldg.,
Don Chino Roces Ave., Makati City, Metro Manila
1231 Philippines
 
VFS Office in Cebu:
Norway Visa Application Centre,
Unit 503, 5th Floor, Keppel Center, Samar Loop
cor. Cardinal Rosales Avenue
Cebu Business Park, Cebu City 6000
Philippines
 

STEP 4: Track the status of your application on this link: https://visa.vfsglobal.com/phl/en/nld/track-application

STEP 5: Pay the necessary additional service fees.  This is on top of the fee that you paid online to the embassy. Take note that this must be paid in cash and it helps to prepare the exact amount in Philippine peso only. Once paid, they will give you a payment receipt (that has your application reference number and details) which you should keep. If you lose this receipt, VFS will not release your visa and passport; they will only release it after you give them a notarized affidavit of loss.

    • The fee is Php 1,530 by 2018.
    • There’s an additional fee of Php370 if you want to send the visa results to you by courier. However, sending passports via courier is at the applicant’s own risk. The Embassy assumes no resposibility for this. (Delivery will be done in 1-3 days within Metro Manila and 2-5 days if the address is in the province. Should the mailing address be outside a serviceable area, you may have to pick up your passport in the nearest courier branch.)
    • Be advised that payment of these fees is NOT a guarantee that the visa will be granted. It also helps to note that these are non-refundable and non-transferable if your application is denied or if you decide to terminate your application.

STEP 6: Wait for the result and collect your passport. You will be notified when your passport is ready for collection from the visa center where you applied. You can either pay an additional fee for the courier and have your passport sent to your address or you can pick-up your passport at the VFS Global. If your visa is approved, you’ll find a sticker visa in one of the pages of your passport. If your visa is denied, then you’ll find a white paper enclosed in your passport specifying the reason for denial.

Quick Facts

  • Validity of Visa : Short-stay Schengen visas allow people to stay in the Schengen area for up to 90 days every six-month period
  • Processing time: The average processing time is 2 weeks, but due to the Covid-19 pandemic, where visa staff work on a skeletal schedule, it may take between 2 to 4 weeks.
  • Where to lodge your application:
    • VFS Manila
      Ground Floor, Eco- Plaza Bldg., 2305 Don Chino Roces Ave. Ext., Makati, Metro Manila
    • VFS Cebu 
      Unit 503, 5th Floor, Keppel Center, Samar Loop cor. Cardinal Rosales Avenue, Cebu Business Park, Cebu City 6000
  • Embassy’s Information:
    • Norwegian Embassy in Manila
      • Address: 12th/F Del Rosario Law Centre, 21st Drive corner 20th Drive, Bonifacio Global City, Taguig City, Metro Manila 1630
      • Telephone Number: +63 (0)2 5317 2700
      • E-mail address: manila.consular@mfa.no
      • Website: https://www.norway.no
  • Visa and Service Fees: 
    • For the complete list of visa fees, please click here. Note that the visa fees must be paid online using a credit or debit card.
    • Aside from the visa fee, VFS will collect a service fee of Php 1,502.00 for each visa application. Please note that an additional courier fee of 3.00 EUR will also be charged to cover the cost of sending documents to the Royal Norwegian Embassy in Bangkok, Thailand. VFS accepts payment in cash at the Norway counter in VFS during your appointment date.
    • Applicants exempted from paying the Visa Fee:

      • Children under 6 years
      • School pupils, students, post-graduate students and accompanying teachers who undertake trips for the purpose of study or educational training
      • Researchers from third countries travelling for the purpose of carrying out scientific research, as per specific rules
      • Applicants related to (spouse, descendant or dependent ascendant of) EEA citizen who are exercising their right to free movement (on production of relevant certificates (birth certificate, marriage certificate, etc.)
      • Applications for Entry visas (d-visa) for skilled workers (including their family members) who have received a concrete offer of employment.
      • In certain cases, the fee may be waived or reduced in accordance with national legislation, when this would serve to promote cultural, foreign policy or development policy interests, other areas of vital public interest, or for humanitarian reasons.

Common Reasons for Schengen Visa Rejection

Here are the common reasons a Schengen Visa application gets denied:

  • No clear travel purpose—a detailed cover letter is a must!
  • Lack of strong ties—reevaluate your application and prove why you must return to your home country!
  • Insufficient travel insurance coverage—make sure you get the right policy!
  • No proof of financial means—convince them that you can afford your trip! Provide bank or credit card statements, VUL, investment portfolio, etc.
  • Passport does not have 2 free pages—where will they attach the visa if your passport pages are already full? You should get a new passport before applying for a visa if there are no more available pages on your old one!
  • No proof of accommodation—you need to prove them that you have a place to stay in the Schengen Area.

Recap and Tips

Helpful tips: You can also watch my Vlog about how to apply for Norway Tourist or Visit Visa on this link:

So, that’s it! I hope that I was able to guide you on how to apply for a Norwegian Schengen Visa with your Philippine Passport. If you ever need help, you can avail my visa application bundle, and I will be glad to help you through the process!

Leave a Reply

Your email address will not be published. Required fields are marked *